Well, today I had planned to start off with a bang by making these really cute sushi magnets made out of felt and yarn. In preparation for this project, I went shopping and bought every color of felt except the black I needed for the sushi's nori. Then, my sister who promised to pick up said felt couldn't bring herself to get out of the car when she pulled into Longs' busy parking lot. When she got home, I rushed back to the store. Of course, they close early on Sundays. I arrived at 7:03 and the door was blocked by the hulking she-male security guard, so I figured I'd just go with my back-up plan.
Play-Doh is one of those gifts that just about any kid under a certain age will get a kick out of. It costs pennies to make, and the Home Made version comes out just as well as store bought.
Home Made Play-Doh
1 cup flour
1/2 cup salt
2 tsp cream of tartar
1 tbsp oil
1 cup water
food coloring
essential oil (optional)
The directions I got off the net said to mix all of the dry ingredients together, add the water and then heat to medium, stirring until the mixture forms a ball in the middle of the pan. I did this the first time I made play-doh for the boys. Briana (my sister--who I will write of often) said that she thought the Home Made was a tad grittier than the store bought. She hypothesized that this was due to the salt not melting all the way during the cooking process.
Tonight when I made this recipe, I first put the cup of water and the salt in the pan and turned the heat to high. As soon as this began to boil I added the food coloring (around 20-30 drops if you want bright colors). I then set it aside to cool while I mixed the remaining ingredients together in the measuring cup. After they were all mixed together I added them to the salt and water and began to stir. Using this method, the Play Doh does not form a ball, but looks more like a dry-ish rue. I took it out of the pan and let it sit for a minute before kneading it for a few minutes. Doing it this way, I noticed an improvement with the texture.
I also noticed the last time I made this that after a while it began to smell oily (I used vegetable oil) so this time I added some essential oils to the dough. I did this during the kneading and was pleased with the results I achieved with about three drops to each batch. So what I ended up with was something akin to those markers we had as kids--you know the ones that all smelled like a different fruit. I did lavender for the purple play doh, rose for the red and spa therapy for the green. Now that I think about it, however, I probably could have avoided the whole thing by using baby oil. I swear, sometimes I am so slow. :)
Anyway, I am happy with the way the play doh turned out. Add a couple of cookie cutters and a rolling pin and you have a complete gift that any kid will have hours of fun with. I found a rolling pin at savers for $2 and bought a tub of 101 cookie cutters from Ben Franklin for $10. Add the flour and other stuff and you are looking at a gift that costs less than $5.
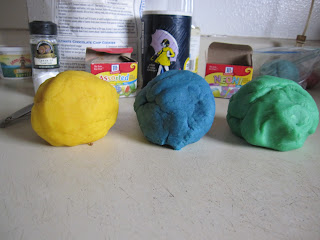
This is a pic of the first batch I made because my lame ass cannot find the cord to upload pics. So, I apologize for my lack of organization and with that I am going to turn in. Tomorrow, I will be back with some sushi for your asses!

No comments:
Post a Comment